Using an email address based on your domain name will help you look more professional and you can create a different email address for each employee, friend or family member. You can use your Professional email account to be a standalone mail box and you can access it on the move using your smart phone. However if you are a technophobe and like Gmail/Hotmail we can send all email on your domain to your existing address and won’t tell anyone.
Step 1 – Log Into your Control Panel
You can access your Easyspace control panel by visiting http://controlpanel.easyspace.com.

Your username and password were sent to you in your welcome documentation. If you do not know your credentials please click the “forgotten password” link.
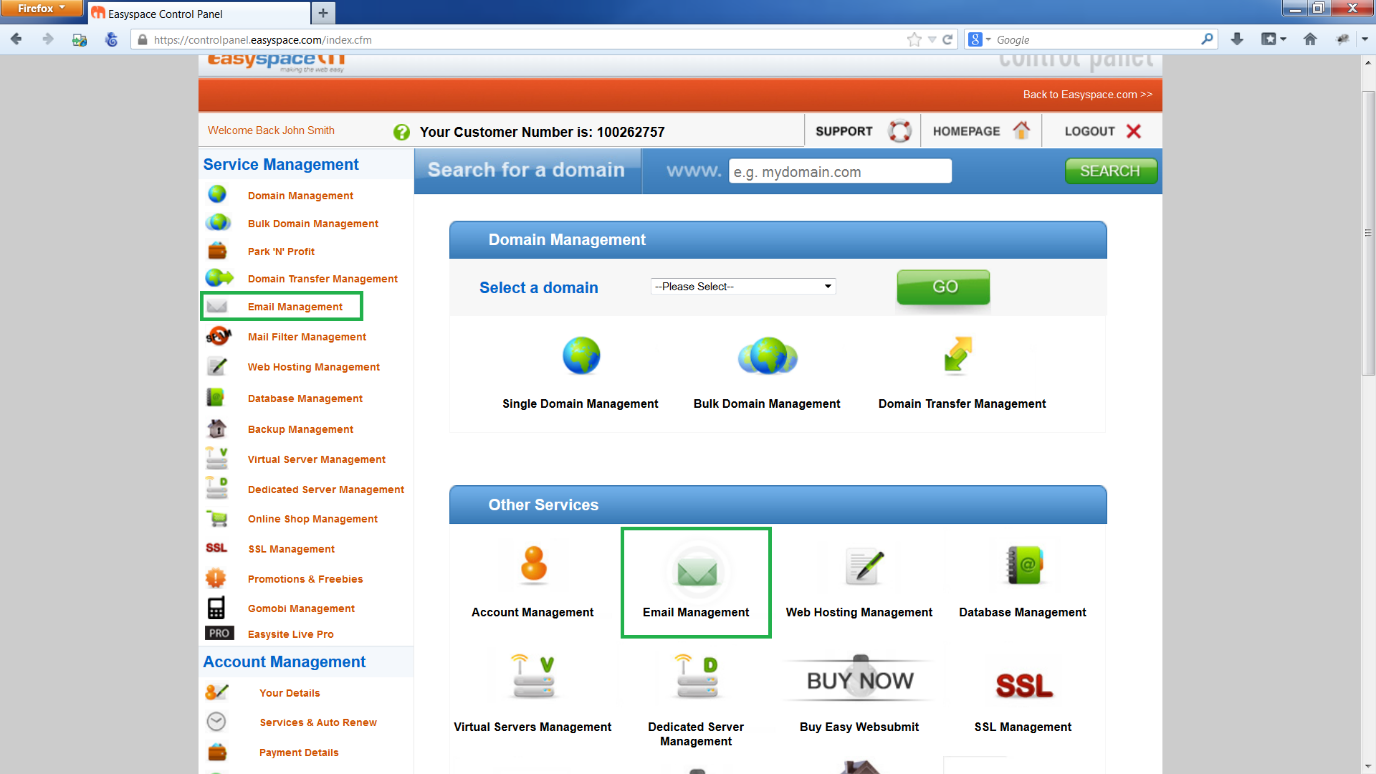
Step 2 – Select your domain name
Select “email management” from the left hand navigation or the main screen
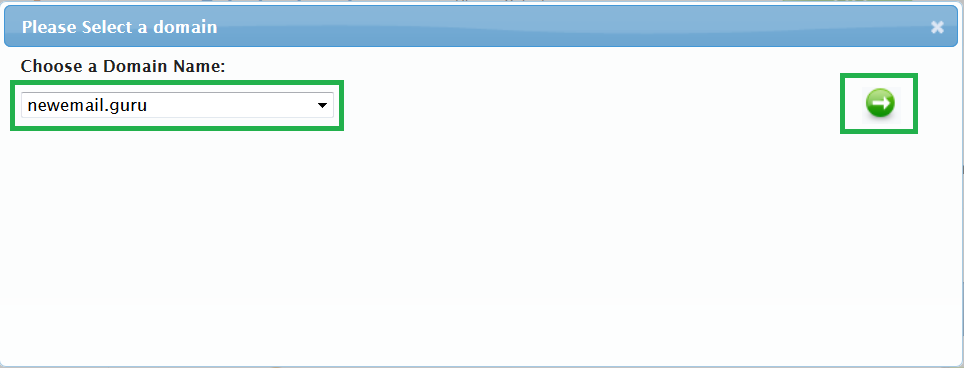
Select your new domain from the drop down and click the “green arrow”
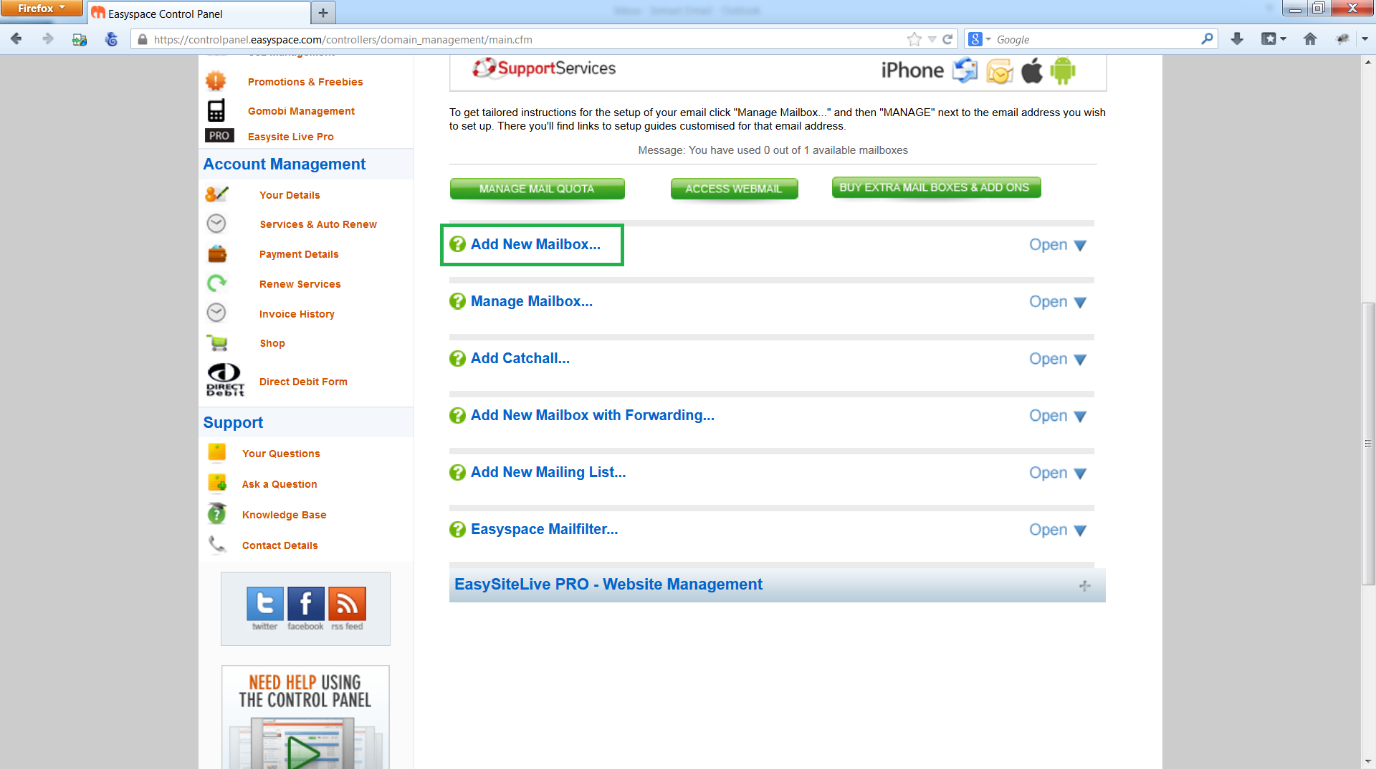
Step 3 – Create your mail box
Select Add New Mailbox
Give your mailbox a name (eg yourname / info / sales / admin), and enter a password you will remember. Then click Add

Step 4 – Adding your mailbox to your mobile device or email client
Easyspace have created customised guides for all mail clients and mobile devices. From the confirmation screen click on the “New Email Setup Guides” banner to be taken to the customised guides for your new mailbox.

Select the Device you want to configure
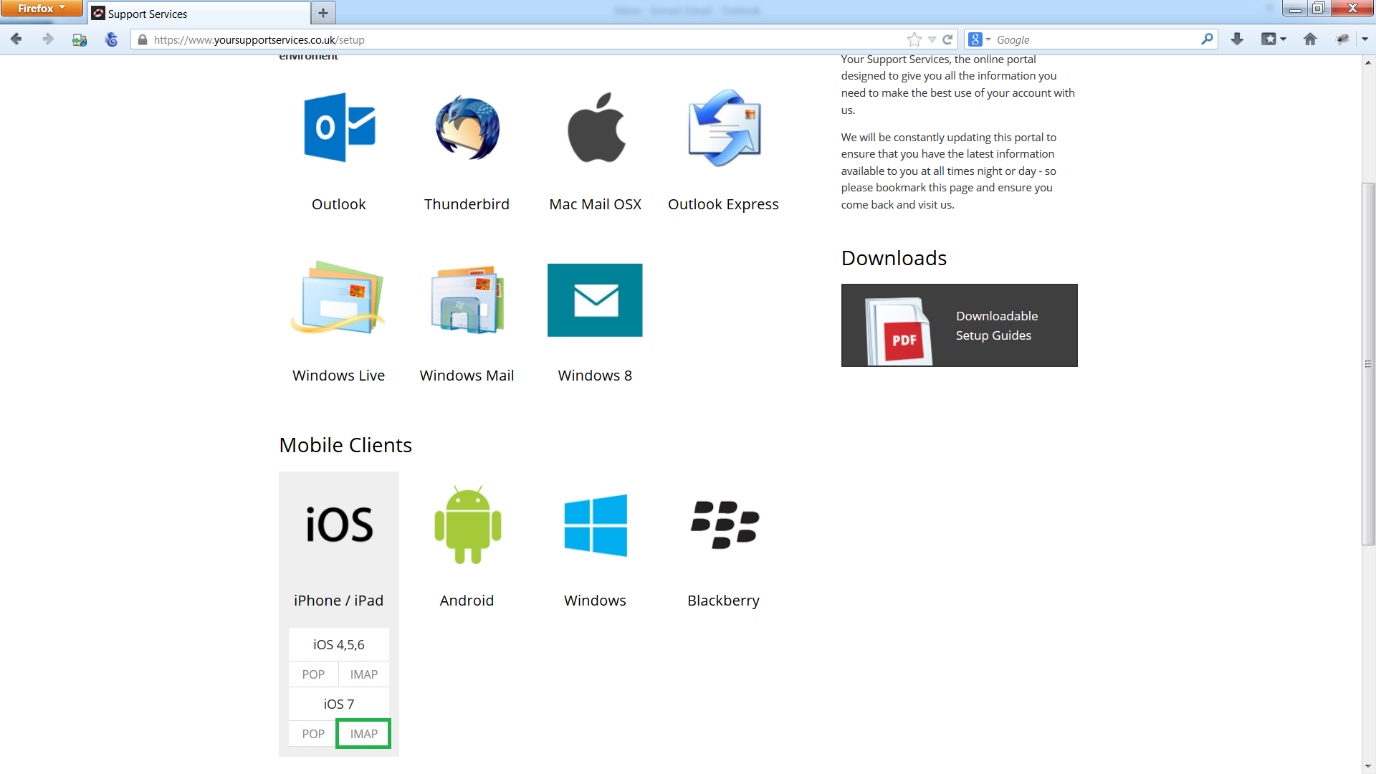
Follow the customised step-by-step instructions

You can now access your email on the client or device you have configured.
Step 5 – Accessing your email via an external account (Hotmail/Gmail)
Once your email box is configured click “Back To Email Management”

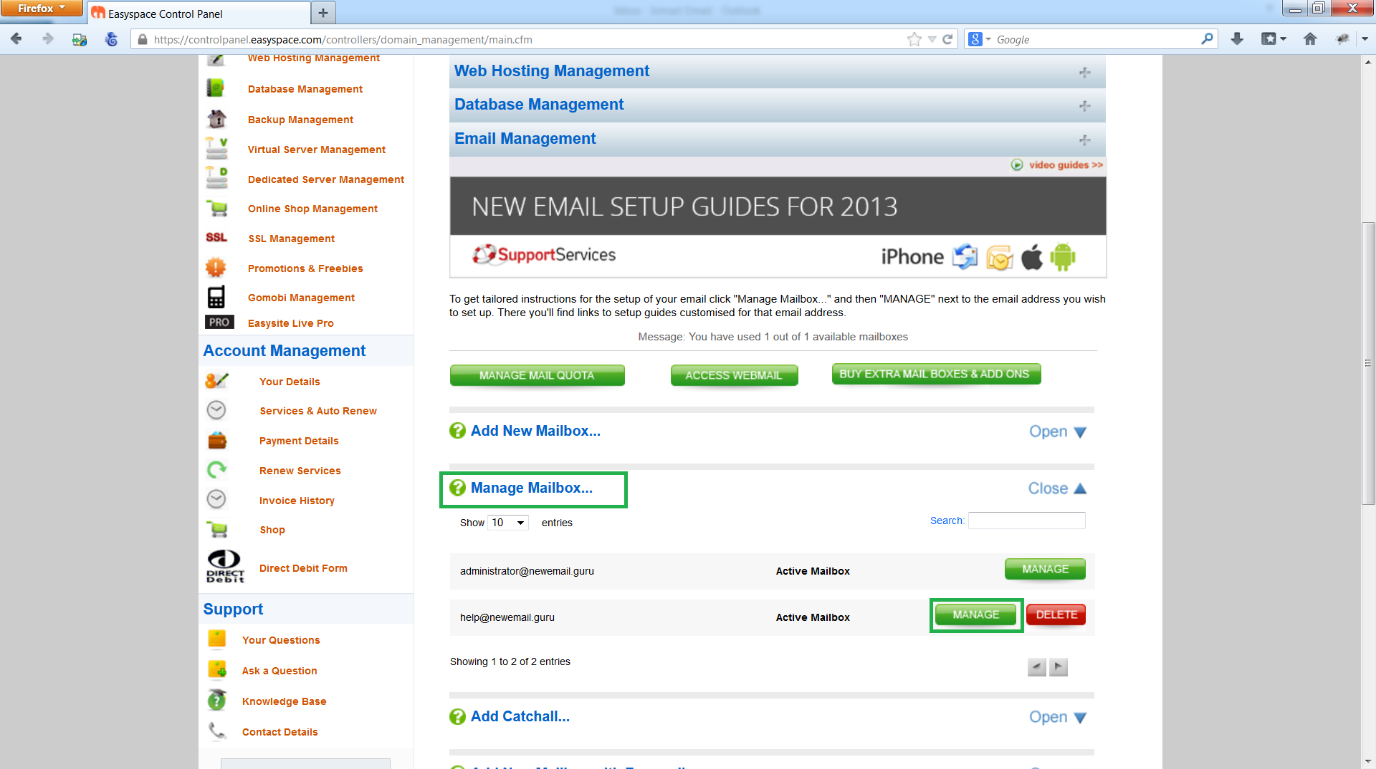
Click “Manage Mailbox” and click “Manage” beside your newly created mailbox.
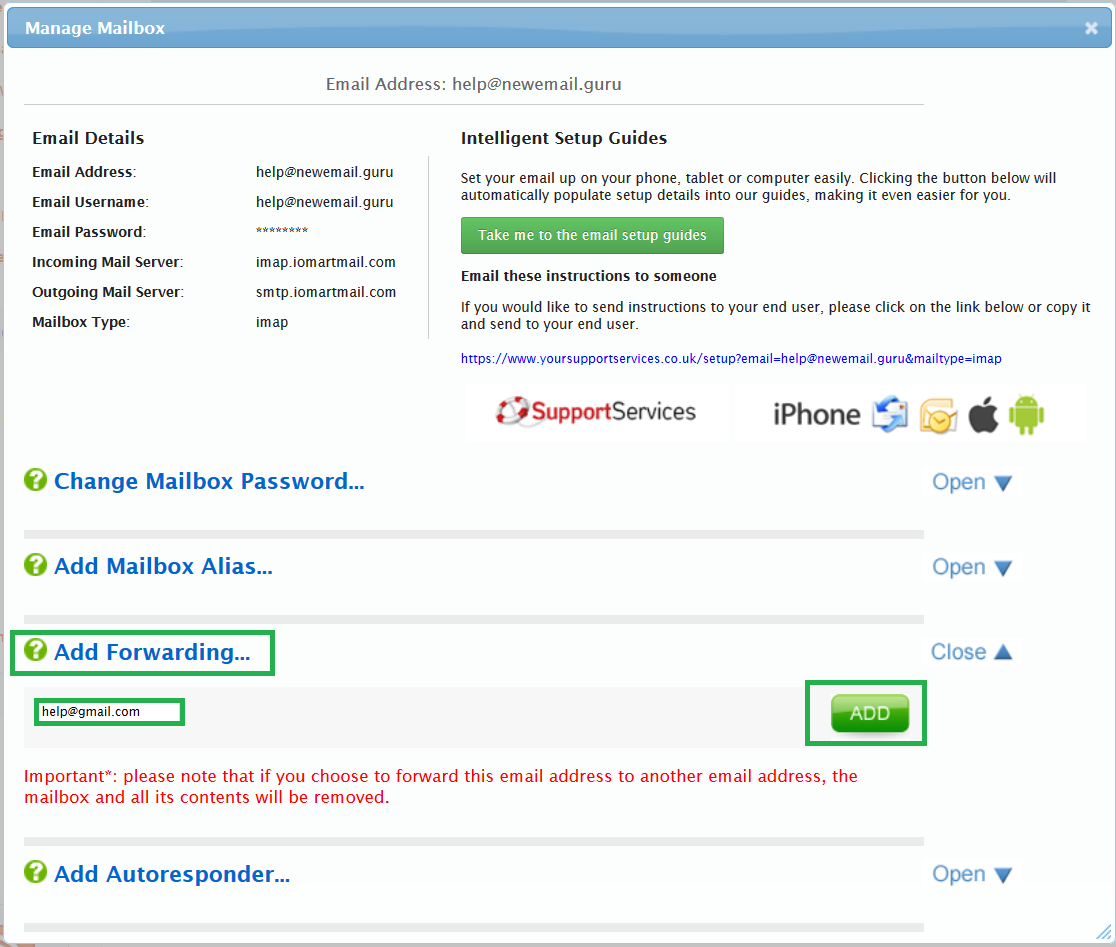
Click “Add Forwarding”, enter the destination (your Hotmail/Gmail address) and click “Add”
If you now send an email to your new mailbox it will be received in the destination email (Hotmail/Gmail)